Plastering is an essential skill in construction and renovation projects, providing smooth and durable surfaces for walls and ceilings. Whether you are a DIY enthusiast or a professional, achieving a flawless finish requires proper technique, patience, and the right materials. Here are ten expert plastering tips to help you get the best results.
Choose the Right Plaster
Selecting the appropriate plaster for your project is crucial. There are different types, including gypsum, lime, and cement plaster. Gypsum is ideal for indoor use due to its smooth finish, while cement plaster is better suited for exterior walls because of its durability. Lime plaster is breathable, making it a good choice for older buildings with moisture concerns.
Prepare the Surface Properly
A well-prepared surface ensures better adhesion and a smoother finish. Remove any loose debris, dust, or old plaster before starting. For glossy or non-porous surfaces, apply a bonding agent or roughen the surface to create a better grip for the plaster.
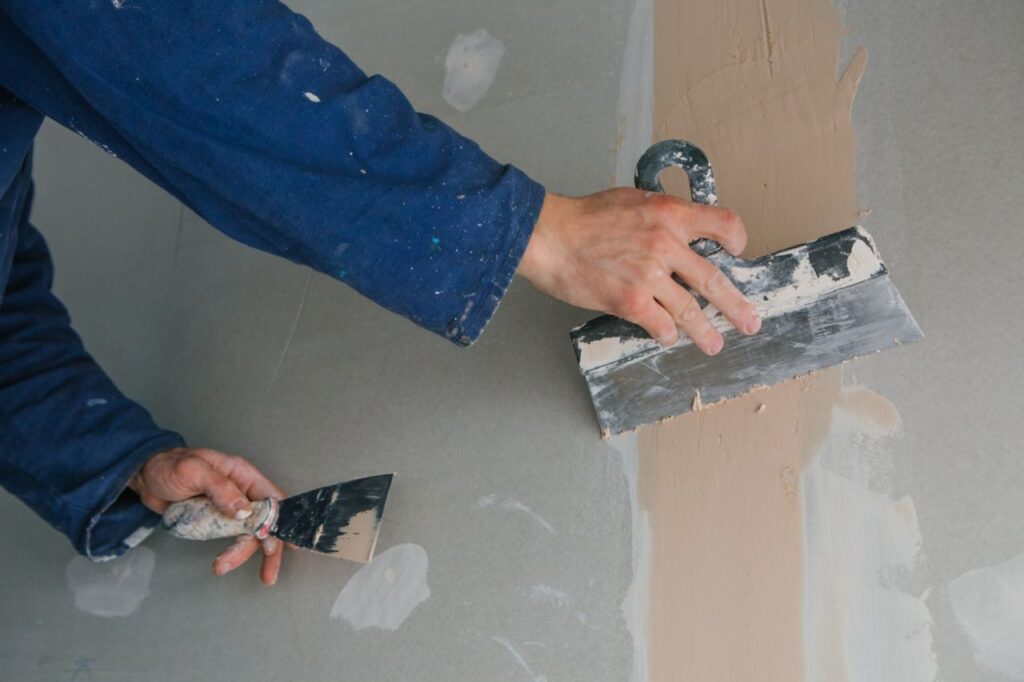
Use the Right Tools
Investing in high-quality tools can make a significant difference. Essential plastering tools include a hawk, trowel, mixing bucket, straight edge, and a sponge float. A stainless steel trowel is ideal for applying and smoothing plaster, while a sponge float helps create a fine finish by removing imperfections.
Mix Plaster to the Right Consistency
Getting the plaster consistency right is key to achieving a smooth application. It should have a creamy, lump-free texture that sticks to the trowel without dripping. Mix the plaster by adding powder to water (not the other way around) and stir thoroughly to avoid lumps. Let it sit for a few minutes before remixing to achieve the best consistency.
Apply in Thin Coats
Thick layers of plaster can lead to cracking and uneven surfaces. Apply the plaster in thin, even coats, building up layers if needed. The first coat, known as the scratch coat, should be rough to help the second coat adhere better. The final coat should be smooth and uniform.
Master the Trowel Technique
Holding the trowel at a slight angle and applying even pressure is essential for a smooth finish. Use long, sweeping motions to spread the plaster evenly. As the plaster begins to set, use the trowel to polish the surface, reducing imperfections.
Control Drying Time
Plaster should not dry too quickly, as it can lead to cracks. Keep the room at a moderate temperature and avoid excessive airflow, which can cause uneven drying. In hot or dry conditions, lightly mist the surface with water to slow the drying process and prevent cracking.
Blend Joints Seamlessly
When plastering large surfaces, ensure smooth transitions between different sections. Overlapping strokes and feathering the edges help blend the joints, creating a seamless finish. Using a damp sponge or a fine trowel can further smooth out any visible lines.
Sand for a Perfect Finish
Once the plaster has dried completely, sanding can help achieve a flawless surface. Use fine-grit sandpaper to remove any high spots or imperfections. Be gentle to avoid damaging the plaster. Wipe the surface with a damp cloth to remove dust before painting or decorating.
Practice and Patience
Plastering is a skill that improves with experience. Start with small projects before tackling large surfaces. Taking your time to apply and smooth the plaster properly will lead to better results. If mistakes occur, don’t rush; let the plaster dry and correct imperfections with a second coat.
By following these expert plastering tips, you can achieve professional-quality results, whether working on a home renovation or a construction project. With the right preparation, tools, and technique, you can create smooth and durable walls that enhance the aesthetics and longevity of any space. If you’re looking for professional plastering services in Auckland, hiring experienced specialists can ensure a flawless finish and long-lasting results.